
Wednesday, 6 September 2017
Letzcraft: Forever flowers
Letzcraft: Forever flowers: Hello everyone this months Clarity stamp and stencil challenge is ALL THINGS JAYNE NESTORENKO what some lovely designs Jayne came up with...

Letzcraft: Roses
Letzcraft: Roses: Hello everyone this month Clarity Groovi challenge is ALL THINGS JAYNE NESTORENKO so I chose Jaynes lovely rose for this wanted to show a b...
Friday, 1 September 2017
Roses
Hello everyone this month Clarity Groovi challenge is ALL THINGS JAYNE NESTORENKO so I chose Jaynes lovely rose for this wanted to show a bit more of the parts I have struggled with the picot and cutting as I am still learning myself hope you enjoy this will put list of the stuff I have used
Clarity parchment
Clarity Groovi Jaynes roses plate
Clarity groovi Jayne frame plate
Groovi Tina A4 square Flowers and butterfly plate
Groovi starter kit
Groovi border perforating plate
Clarity groovi boarder plate Henna / banner boarder plate
Grovi boarder plate holder
Black groovi board /
tools snips two pin perforating tool / single perforating tool
Thin double side tape / faber castell poyochromo colour pencils
New England fall papers /Tumble drier sheet
Before we start use tumble drier sheet on the side you do all your white work and scoring as this will help your tools glide so this is the reverse side of parchment you use the front side of your work for perforating and snipping out soft side of board for perforating and white work hard side scoring and colouring hope this helps

Lets get started just score the out sides of the frame of the plate

Add your rose to the centre of the frame

Add Happy birthday from the frame plate
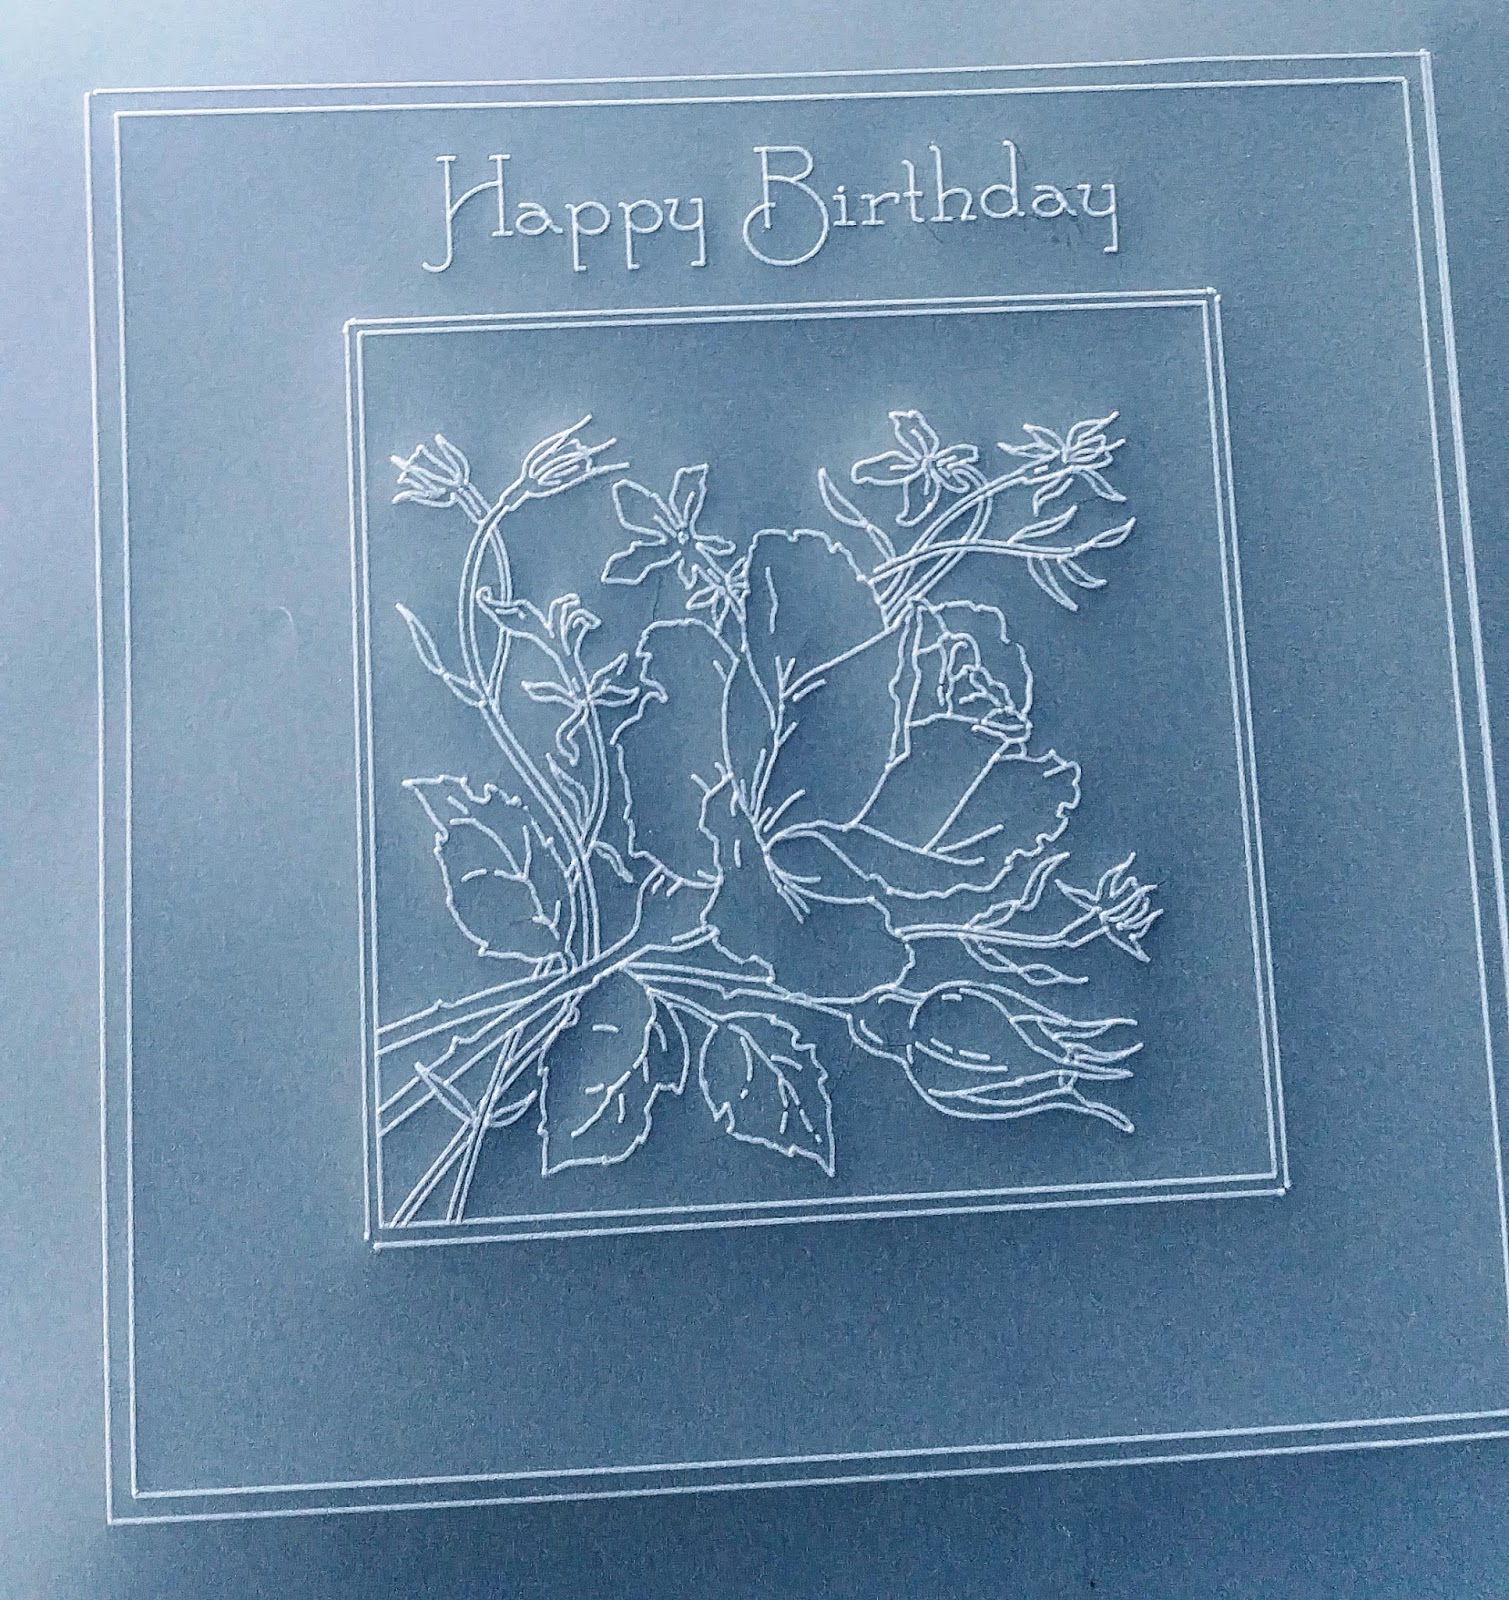
Back using the rose plate again I added roses and leaves around the inside of the plate But not around the Happy birthday

Using boarder holder plate I added the shape from Henna boader plate to the out side of the frame
Now with the banner border plate I put part of it to fit in around the roses

Now your white work a little at a time be patient don't do to much at a time other wise will buckle the parchment Then add colour on the reverse but on a hard side of the board. Now with the no 1 tool and perforating Boarder plate add dots to the corner I'm afraid I made mistake so got Tina plate out of flowers and made a moth to put over this part we learn by our mistakes


Now to the part I find hard with the two pin perforating tool and your parchment facing the front go around your flowers and leaves and around the outside of the banner and in between the shapes on the outside of frame you can also do around the very edge I use the snips I find this easier than the scissors but what you get on with is the best I did my picot cutting around the flower first then using fine double sided strong tape added to my papers hope you enjoyed this thank you for visiting my blog

Forever flowers
Hello everyone this months Clarity stamp and stencil challenge is ALL THINGS JAYNE NESTORENKO what some lovely designs Jayne came up with I decided on my work for this I would have a go at water colour for a change using the colour bursts can I apologise that some of my photos are up side down it is a new phone great one but been having trouble with the soft wear I will put a list of what I used below
Water colour card
Ken Oliver colour bursts
Paint brush water / plate mix colours / paper towel
Letraset aqua markers
Versafine permanent Onyx black
Clarity sentiment stamp
Clarity stamps Jaynes Dahlias
Distress ink pad tumble glass/ Clarity stencil brush
Lets get started


Now add the butterfly and the sentiment

I used the blue first mixed the colour burst on my plate only use a little powder goes a long way made it watery can always add more dabbed my paint brush around. at times I used kitchen roll if its to wet or to dark dab the card I carried on with this it felt had enough then added bit red to the blue did the same again

to the lower end of the card was more red but still watery


Wednesday, 2 August 2017
Letzcraft: My Garden Party
Letzcraft: My Garden Party: Hello everyone well we are in August already this months Clarity challenge is GARDEN PARTY my thought to this was lots of flowers hope you e...
Letzcraft: Garden Invite
Letzcraft: Garden Invite: Hello everyone this months Clarity challenge is GARDEN PARTY this is what I came up with for this I will leave a list of what I used to mak...
Tuesday, 1 August 2017
Garden Invite
Hello everyone this months Clarity challenge is GARDEN PARTY this is what I came up with for this I will leave a list of what I used to make this below
Clarity Stencil card
Clarity groovi club Butterfly plate
Andirondack pitch black /Raspberry/ peach bellini
Distress ink pad / tumble glass Mustard seed/ spiced Marmalade /peeled paint
Promakers fine tips
Faber castell poychromo colour pencils
Brighton rock papers
Clarity stamps Numbers / Letterbox sentiments stamps
Masking tape / make up sponge
Clarity stencil brushes ?
Clarity parchment ? Perga glue /Gems
Clarity Black board for groovi
Pergamano tools and snips

Lets get started with the circle shape stamps from numbers stamps I stamped these in black ink

And covered with the masks you get with these stamps

Fix your stencil to the Card using masking tape at the top and bottom to secure with stencil brush for each colour I held my hand at different parts ( higher you hold the brush the lighter the colour then the lower you hold it the more colour you apply ) when you are happy with this go in with a make up sponge to add more colour to the centre of the flowers and where else you might want darker Carefully lift the stencil to see if it is as you would like carefully remove stencil and remove masks

Remove your masks with promakers you can give this bit more depth of colour but I used the fine nibs and added an out line to the colour stencil image choosing the nearest colours that I had to do this

With the Grovvi club plate I did two butterfly's using groovi tools on the reverse side my white work on a soft side of the board Then back to hard side of board but reverse of the parchment colour the two butterfly's in. now with two pin perforating tool and parchment on the right side and perforating mat go around the outside of the butterfly and with parchment scissors snip both butterfly's out on the one I used for the top took off the antennas and the little white pieces off I used Perga glue to attach to the card and added gems to antennas

I used the paper from Brighton rock to mount this as I felt the colour and the stripe matched in well hope you enjoyed this card Thank you for visiting my blog hope I will see you soon xx

Subscribe to:
Posts (Atom)